

Installing Solar On A Motorhome
Product Review: Renogy Solar 400W Starter kit with MPPT Charge Controller
Since the beginning, we had been thinking about installing solar. There were many reasons: 1) To be more green, silent, eco-friendly and energy efficient 2) To cut back on using our generator which runs on expensive propane and 3) To stop worrying about having to constantly find and fill propane while on the road.
Having solar would let us boondock and stay in campgrounds without hookups longer, since we wouldn't use up our propane so quickly. Also, it would open up the opportunity to stay with friends without waking up an entire neighborhood with the loud roar of the generator.
Now, I know little to almost nothing about electricity, electrical systems, or how much power we consume daily. All things that might be good to know in order to configure a proper solar power system. Fortunately, many fellow RVers we've met on the road had experience with solar power systems and were more than willing to share their knowledge. Phew!
We choose a Renogy system because we were told that it was idiot proof- I liked that. Plus a call to Renogy’s sales department really helped me figure out what I needed for our rig and how to install the system. The Renogy sales rep was very helpful and answered all the questions I had, which made me confident that I could put this system together without electrocuting myself!
We bit the bullet and purchased the Renogy 400 Watt 12 Volt Solar Starter Kit which retails at $689.99.
We chose to add fuses on the wires running to and from the charge controller and we decided we would upgrade our charge controller from a 30A charge controller to a 40A charge controller with a monitor. This upgrade would give our charge controller more expandability if we ever add more panels, and lets us monitor our system’s output and gives us the flexibility to change system parameters as needed.
Our total cost with free shipping came to $843.00 for the charge controller and monitor mentioned previously, 4 solar panels, the mounting brackets and hardware to mount the panels to the roof of the RV, and all the wires to hook up the system.
Installation
The hardest thing about setting up the system (apart from the weather totally not cooperating as it was pouring rain for days) was figuring out where the wires would run. I had to get the wires from the panels I would eventually mount on the roof to the charge controller inside the RV, and then get the wires from the charge controller to our bank of batteries.
Renogy recommends not extending the cables whenever possible, as extending them can decrease the efficiency of the system. This was a challenge, but I laid the wires out, put them in different configurations, and eventually came up with a route for the wires that would work and a location for the charge controller and monitor.
Once this was done, I carefully attached the battery tray cables to the battery bank and checked the charge controller. It powered on the first time and worked properly. This was no small miracle, as our history in rig upgrading has proven we're not lucky on the first try.
Now we just needed to mount our panels to the roof and hook them up. I took the boxes the solar panels were shipped in and cut them into templates the size of the solar panels so I could work out exactly where the panels would go. Then we carried the panels to the roof and Alex climbed out onto the roof to attach the panels.
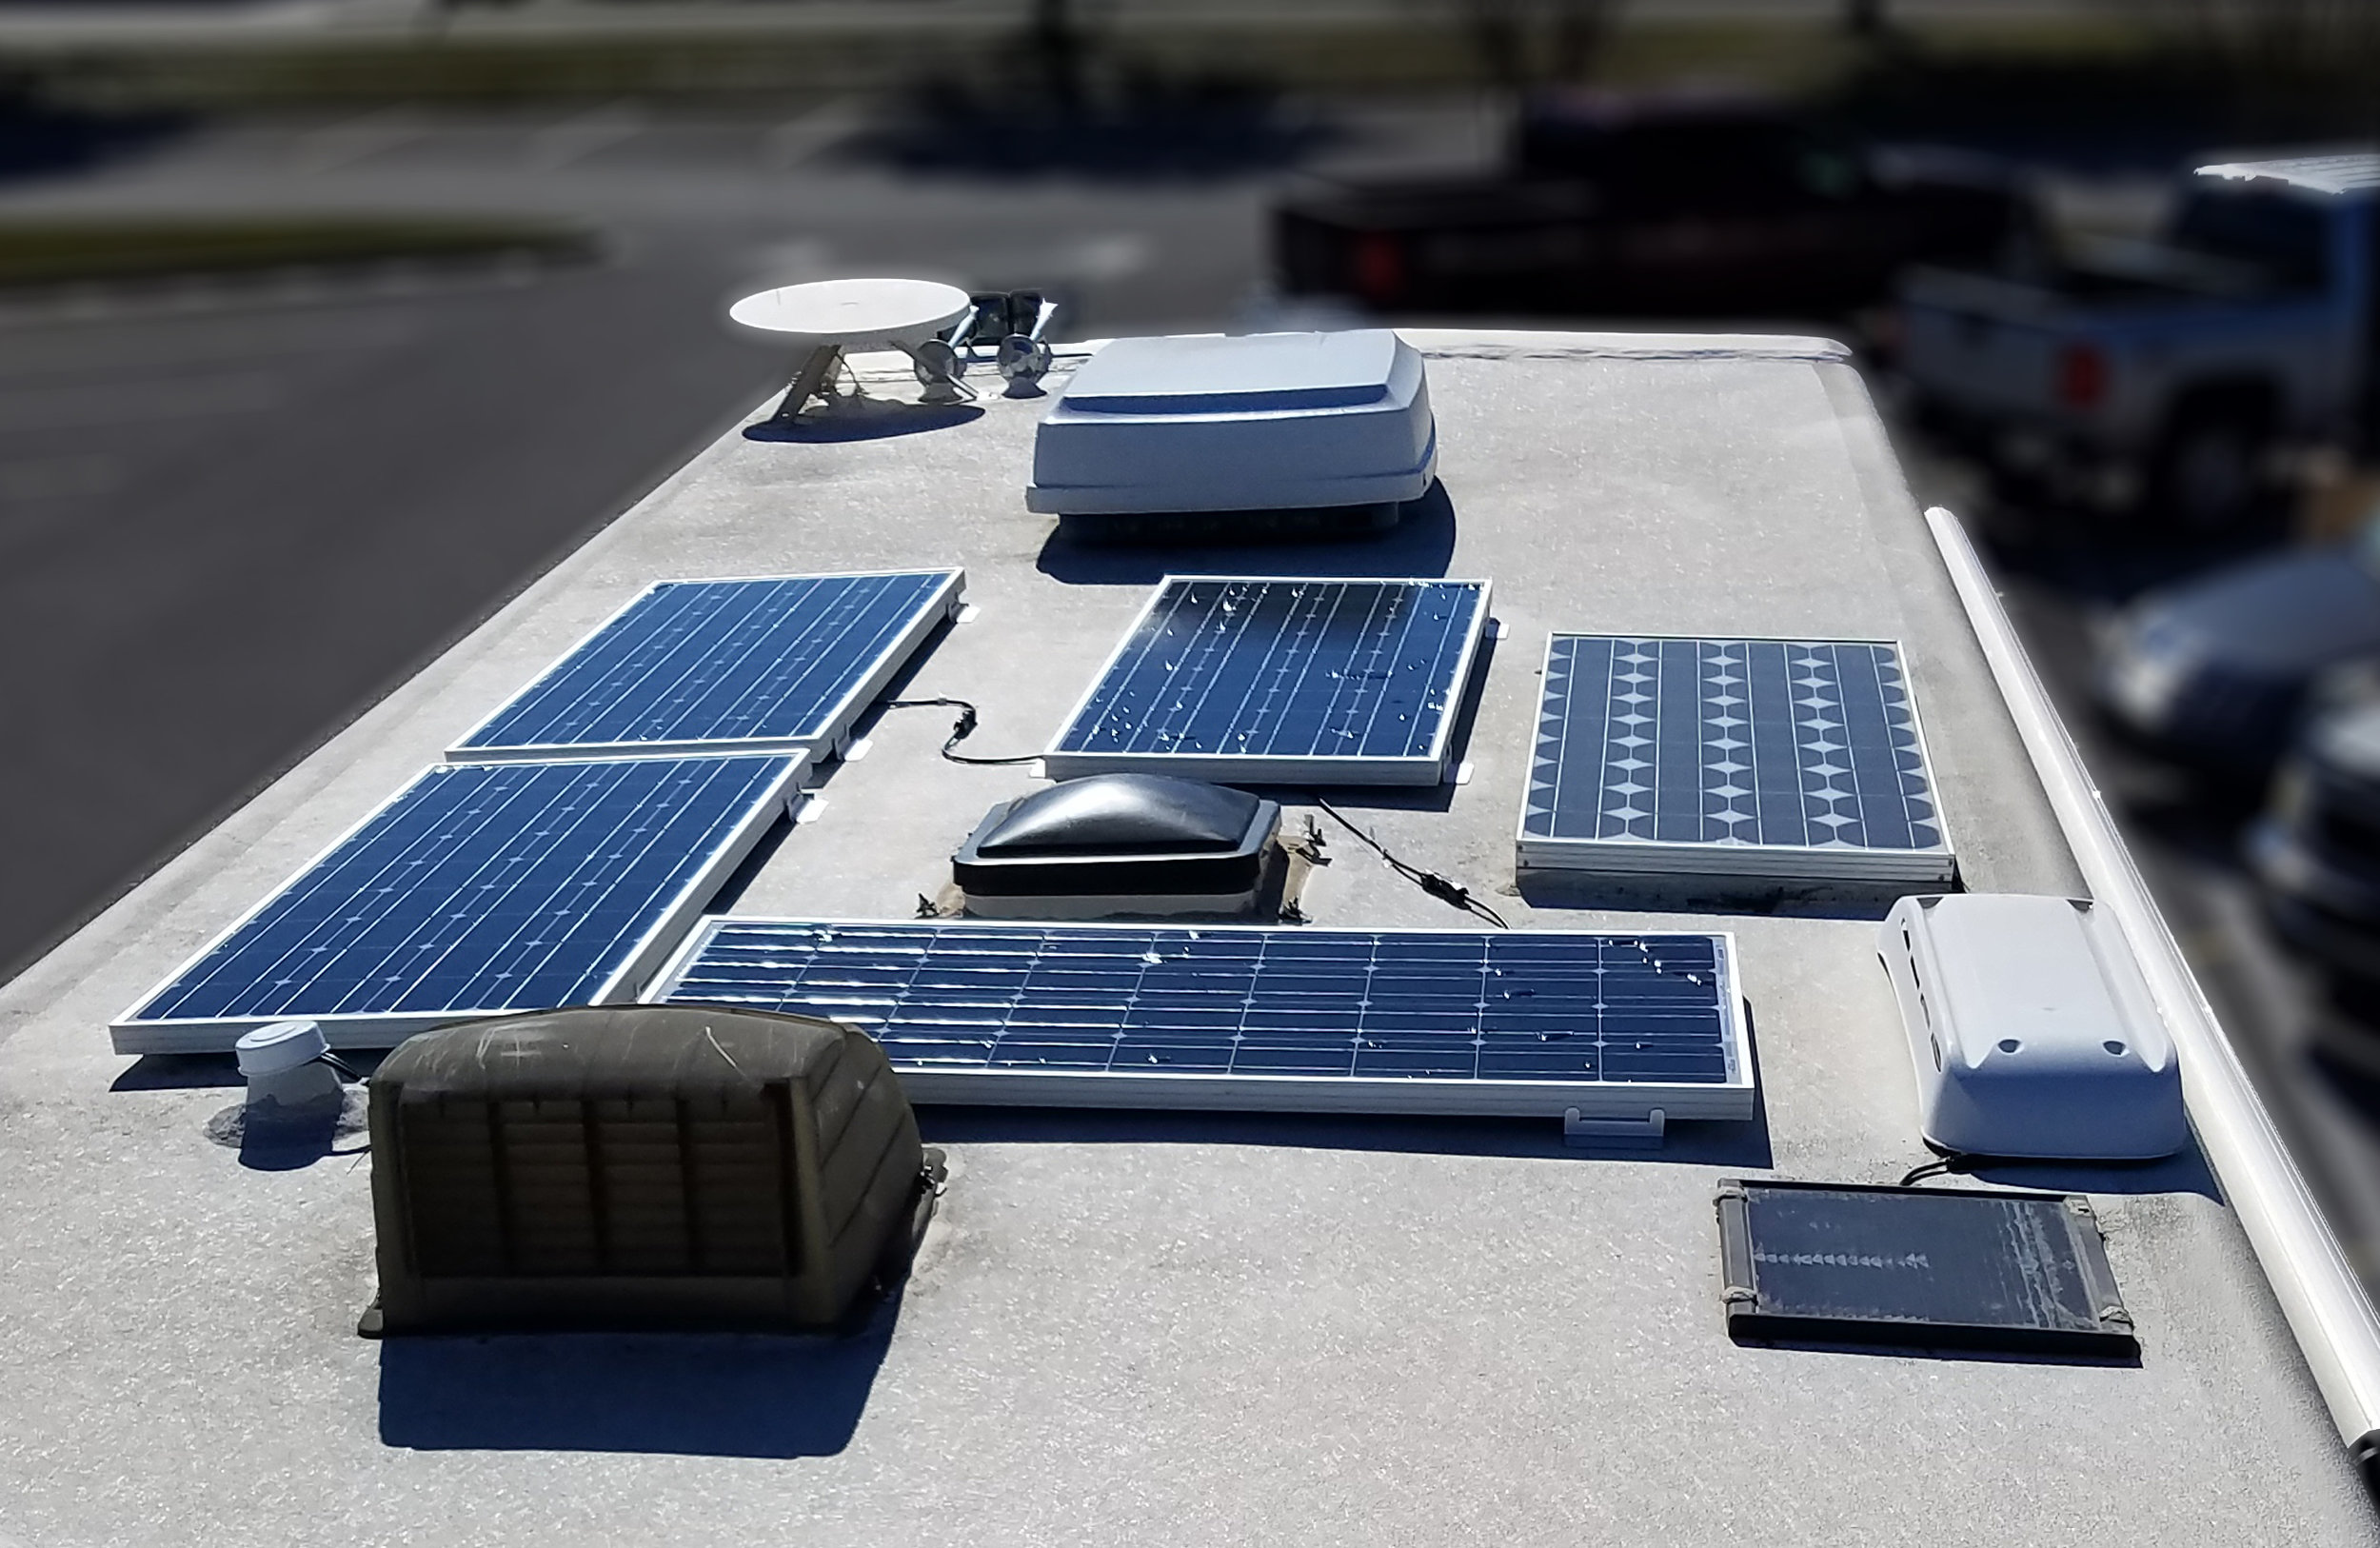
We used 3M VHB tape to permenantly attach the brackets on the panels to the roof. In RV life, putting holes in your roof is a disaster waiting to happen, so when we heard from other RVers about this tape, I was relieved but also thought it sounded crazy . (Note: Renogy gives you screws, etc to attach the panels, so VHB tape is not part of their official recommendation. Proceed at your own risk.),
However, after lengthy discussions with people I trusted, I was convinced it was the way to go. One of these people had driven 10,000 miles since his install and the panels hadn’t moved. The other friend is an architect who called 3M directly and asked what product they would use and they said VHB tape.
On researching it myself, VHB tape is used in many applications to replace welds.

The panels mounted quickly to the roof and the bond cured to 50% within an hour, 75% within 24 hours and 100% within 72 hours.
Wiring the panels was very easy. Renogy uses connectors on their preinstalled wiring that snap together almost like Legos. They are clearly labeled and because they only connect positive to negative, you can’t mess it up and reverse the polarity accidentally.
Once the wires were connected, I ran the wires down our gray water vent pipe, drilled a small hole in the gray water vent pipe inside the coach, and was able to pull the wires through to the charge controller. This allowed me to once again avoid putting an unnecessary holes in the roof of our RV.

Once connected, we immediately started generating power and charging our batteries. We've been thrilled with this system ever since!
A Bit of a Bummer
The only slight annoyance we had with Renogy was regarding registering our products on their website. I learned after we had installed our solar panels with permanent tape that the serial number for each panel is needed for registration. This serial number is located on the backside of the panel near where the wires connect to the panel. So, basically in a spot that is impossible to see once the panels are installed. There was nothing in the packaging, nothing on the website, nothing mentioned by sales or tech support, and nothing in the product manual that mentions that the serial number should be collected before installing.
I called Renogy and asked if they could pull up the serial numbers of the units I purchased. They said they could not, but that it was not necessary for warranty coverage. Hopefully, we will never have to test whether or not that is true. So if you get this system, make sure you get the serial number before you install!
If you want to be more green and/or spend more time off the grid, this kit will let you do just that. Shopping around, we found it to be a good value for a very complete kit. You won’t have to make a last minute Home Depot run to pick up parts they forgot to include. We definitely recommend this kit.
Get the Upgraded Controller!
I also would recommend the upgrade to a charge controller with a monitor. I’m slightly obsessed with watching what our panels are doing and seeing the power we are generating. I may or may not have little celebrations when we hit a new record high for power generated…

Even if you are not obsessed the way I am (I have actually heard from a lot of people I consulted with that pretty much anyone who has a monitor on their system gets obsessed), it is helpful to be able to see when you are producing power, when you aren’t, when you have a decrease in power, etc so you can figure out how best to park your RV for the most efficiency. You can also change the type of batteries you are using as well as access some functions I have not yet learned about just yet.
We Recommend Renogy
The kit is very complete. It gives you everything you need to set up a system, even if you are like me and have very little knowledge of what you are doing. Renogy’s tech support is great after the sale. I called several times during the install process just to be sure that I was doing things correctly and they quickly and patiently answered any questions I had. The product is well packaged when shipped, so I would be shocked (pun slightly intended) if any item in the kit was ever damaged in shipping.
It really was a far easier process than I initially thought. We are now to the point where we pretty much only use our generator if we are baking something in the oven.
Renogy has a great products to get you started with solar power! Buy yours today!


